Page 1 of 1
Drum Major Baton ... Cord Wrapping
Posted: Mon Oct 06, 2008 6:09 pm
by Geoffrey011
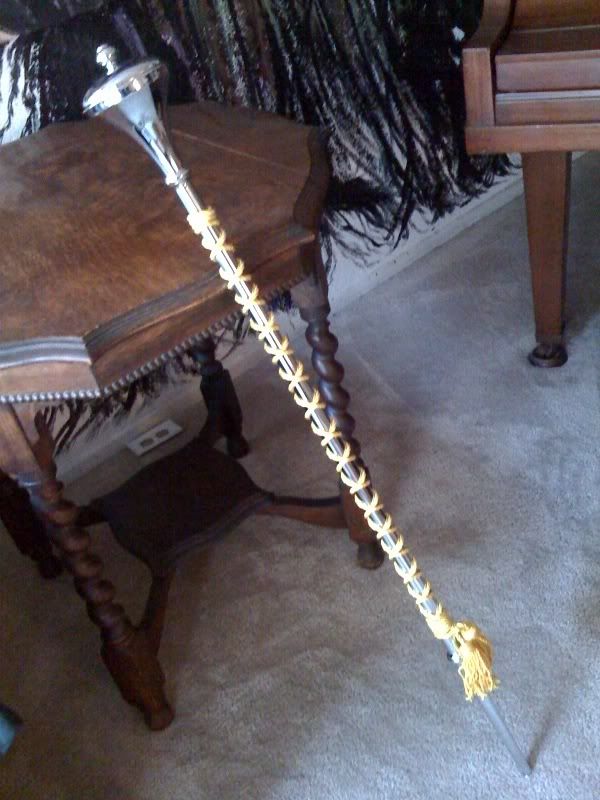
So, I recently got a new Drum Major baton ... It came wrapped in a black cord. Someone at my High School decided to sabotage me and cut just one little cross so it started fraying and I ordered a new cord. The only problem with this is I DON'T KNOW HOW TO WRAP IT. Neither does my director, and I cant find anything at all on the internet as to how to do it, other than a book to order. Can someone explain how to wrap it? Or give me a link to a website explaining this?
Thanks So So Much!!
Geoffrey
Re: Drum Major Baton ... Cord Wrapping
Posted: Mon Oct 06, 2008 9:15 pm
by PGOK
Geoffrey011 wrote:So, I recently got a new Drum Major baton ... It came wrapped in a black cord. Someone at my High School decided to sabotage me and cut just one little cross so it started fraying and I ordered a new cord. The only problem with this is I DON'T KNOW HOW TO WRAP IT. Neither does my director, and I cant find anything at all on the internet as to how to do it, other than a book to order. Can someone explain how to wrap it? Or give me a link to a website explaining this?
Thanks So So Much!!
Geoffrey
From Tom Peacock:
http://www.marchingworld.com/pg320.htm
As I recall, the postage is more than the booklet.
Re: Drum Major Baton ... Cord Wrapping
Posted: Mon Oct 06, 2008 11:38 pm
by mikekimchi
Hmmmm...this is from my memory of 11 years ago. My baton is in the garage, and I'm too lazy to get it. I'd suggest reading all steps before proceeding to wrap.
Sit on a chair with the baton under you, head out in front of you. It's not the most flattering way to be seen, but it's temporary so don't fuss about the discomfort too much.
Cross the cord under the baton about two or three inches from the neck, splitting the cord with about two-thirds on one side (we'll say to the right for this example). NOTE: I'm not 100% certain on this ratio (it's been a while), so you may have to play around with it.
Bring the shorter end of the cord (the left end) over the baton (over to the right) so it is wrapping down at about a 45- or 50-degree angle.
Wrap the longer end around the baton and OVER the shorter end, laying each loop adjacent to the last. Make sure it is a tight wrap, and repeat about 13 times (13 was always my lucky number for this, but you can do as many or few loops as you'd like. Just remember that this will potentially change the number of loops at the bottom end).
Do a double twist after your last loop, to keep it tight.
Now do the standard criss-crossing loops with both ends of the cord. Make sure that they alternate on which cord is on top (for instance, every time you switch hands with the cords, the right hand cord always goes on top, or the opposite). Doing so will make sure that both cords stay in place with a tight wrap, and the lengths of each end are not affected for the later steps. Don't space the criss-crossing out too much; you'll stretch and spread them out at the end (I used to keep about an inch or so between each criss-cross on the same side). Also, do your best at keeping the criss-crossing aligned, for a clean uniform look.
Halfway through this process, you'll need to get up, switch ends on the baton so the ferrel end is now sticking out. When doing this, make sure to hold on to the criss-crossing so they don't loosen, and don't get mixed up on which end is going over the other.
Once you either get close to the end (about eight inches from the tip of the ferrel) or it looks like the longer end will be just about enough to wrap around the shorter end with about two inches left on both, do a double twist. Yup, this is a bit vague, but it all depends on the ratio from the beginning.
Do the same looping as in the beginning, in the same direction. Ideally, you will have the same number (or close to) of loops as in the beginning.
Do a simple double knot at the end, keeping things tight. Hopefully, there are two or three inches of uncovered baton at each end.
From the center of the baton, start stretching the cord out to the ends slowly, spreading the coverage closer to the ends (as far as the neck up top, as far as the beginning of the ferrel down bottom). This will not only make the baton look longer, thus the illusion of being faster when you spin, it will tighten the cord so it is secure.
Tah dah!
NOTE: If you don't want to guess on the ratio in the beginning, you can always do a 50/50 split and go in the opposite direction on the bottom, or just do the second double twist on the opposite side of the shaft. Theoretically, it should even things out...I just always preferred the look when they go in the same direction, and the double twist is on the same side of the shaft. Yes, I was very picky.
Also, I always preferred unraveling the tassels and leaving the taped-knotted ends. It gives a cleaner look when the ends are tucked into the wrapping, especially on stops, and increases spinning speed very slightly.
Oh...and remember that lighter colors tend to make the spinning look a bit quicker, but require more cleaning care or replacement. Peacock used to love reminding me to change my yellow cord at every other band review.
Hope this helps!
Re: Drum Major Baton ... Cord Wrapping
Posted: Tue Oct 07, 2008 4:09 pm
by dmcoach
 Ta daaaaaaa!